If you’ve priced out a flooring installation lately, you already know the labor quote can sting as hard as the material cost. Doing it yourself — meaning you rent or buy the tools and put in the work — is how a lot of homeowners cut their total project cost by 30 to 50 percent. But there’s a catch: the “DIY flooring kit” category is full of bundle deals and starter packs that mix genuinely essential tools with marginal add-ons you’ll use once and forget. Knowing the difference before you spend matters a lot more than it sounds, because the tools that actually matter aren’t always the ones that look impressive on a shelf. This guide breaks down every category — what’s load-bearing, what’s optional, and what you can confidently skip — so you’re buying a working kit, not a closet full of regret.
A quick orientation: when we say “flooring kit,” we mean the collection of tools and accessories required to take boards off a pallet and get them properly nailed, glued, or clicked into place on your subfloor (the structural layer beneath your finished floor). Some tools are non-negotiable. Others are sold hard but solve problems you probably won’t have. The comparison sections below organize your choices by budget tier — budget, mid-tier, and premium — so you can map the right tool to your project scope without overspending.
The Non-Negotiables: Tools That Actually Drive the Install
These are the items where skimping either fails the job or costs you more in rework than the tool itself would have.
Flooring Nailers: Budget, Mid-Tier, and Premium Options
For solid hardwood — the kind you’re nailing into a wood subfloor — a flooring nailer is the single most important tool in the kit. It drives cleats (small L-shaped nails) or staples at a precise angle through the tongue of each board, which fastens the floor while keeping the fasteners hidden. Without one, you’re face-nailing every board, which leaves visible nail holes across your entire finished surface.
Bob Vila’s flooring nailer coverage identifies three realistic tiers for DIY and light-contractor buyers, which maps cleanly onto how much floor you’re installing and how often you’ll pick the tool up again.
Budget Pick: Manual Mallet Nailer
A manual nailer — struck with a rubber mallet to drive each cleat — costs $50–$90 purchased new and requires no compressor. It’s slower and more physically taxing than a pneumatic model, but for a single-room install it’s a workable choice. Most accept standard 1.5-inch or 2-inch 16-gauge cleats. For 3/4-inch solid maple, you want 2-inch cleats minimum so the fastener reaches enough subfloor to hold under foot traffic. If a kit includes a nailer sized for 18-gauge finish nails, it is not a flooring nailer — don’t let bundled accessories blur that line.
Saker
$19.99
In stock on Amazon
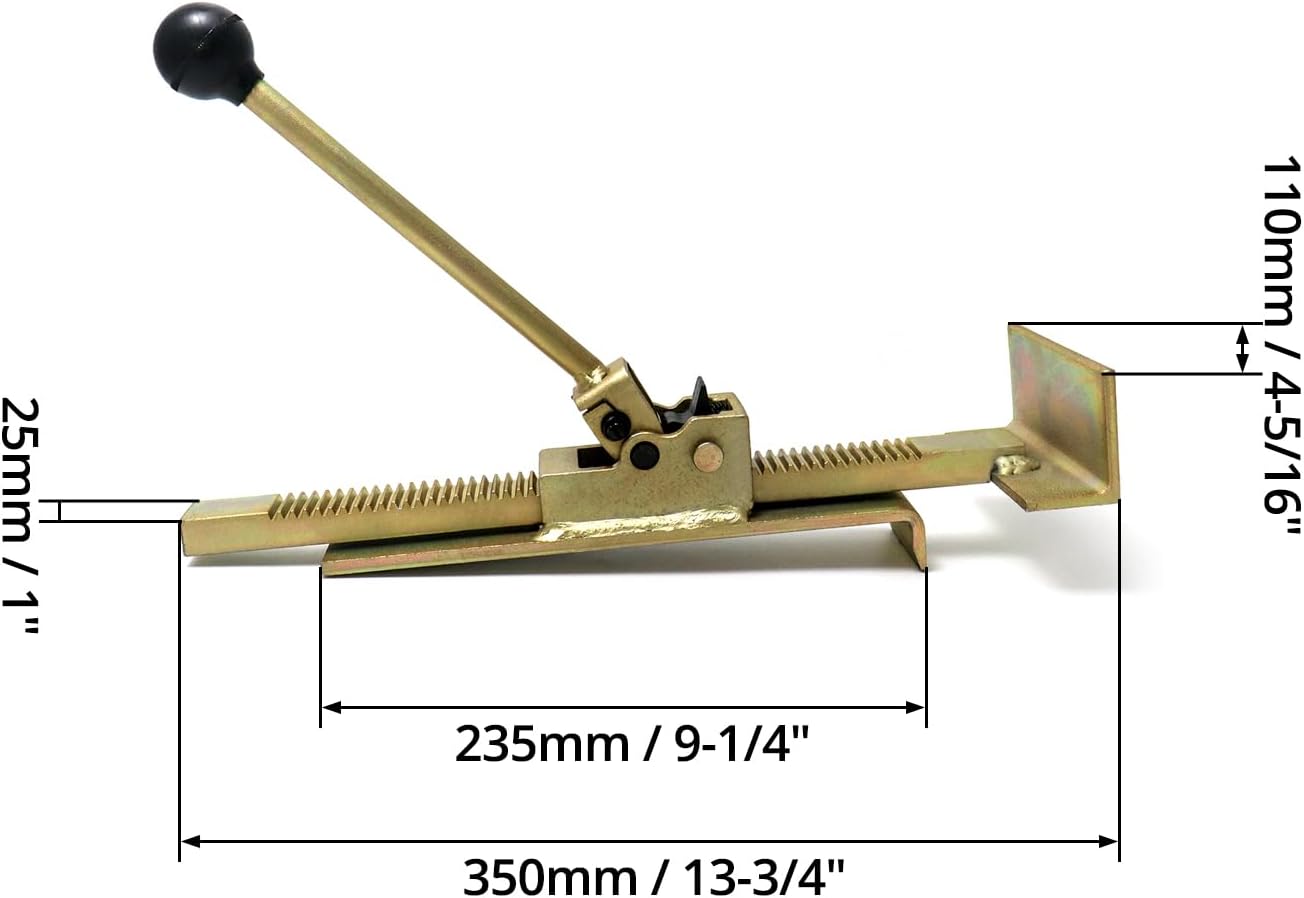
Check price on AmazonMid-Tier Pick: Rented Pneumatic Cleating Nailer
At most tool-rental counters, a pneumatic flooring nailer runs roughly $45–$65 per day. For a project that takes a weekend across one or two rooms, renting almost always wins over buying. Bob Vila’s roundup consistently places pneumatic rental as the sweet spot for DIYers who won’t use the tool again — faster and less fatiguing than a manual model, without the upfront cost of ownership.
NAACOO
$39.99
In stock on Amazon
Check price on AmazonPremium Pick: Owned Pneumatic Nailer for Multi-Room or Contractor Use
For a contractor doing back-to-back installs or a homeowner tackling multiple rooms across separate visits, ownership at the $300–$500 range for a quality pneumatic model pays off by the third job. Fine Homebuilding’s tool coverage notes that the brands installers still name after five years of regular use are invariably ones they purchased rather than ones that came in a branded starter kit.
QWORK
$52.97
In stock on Amazon
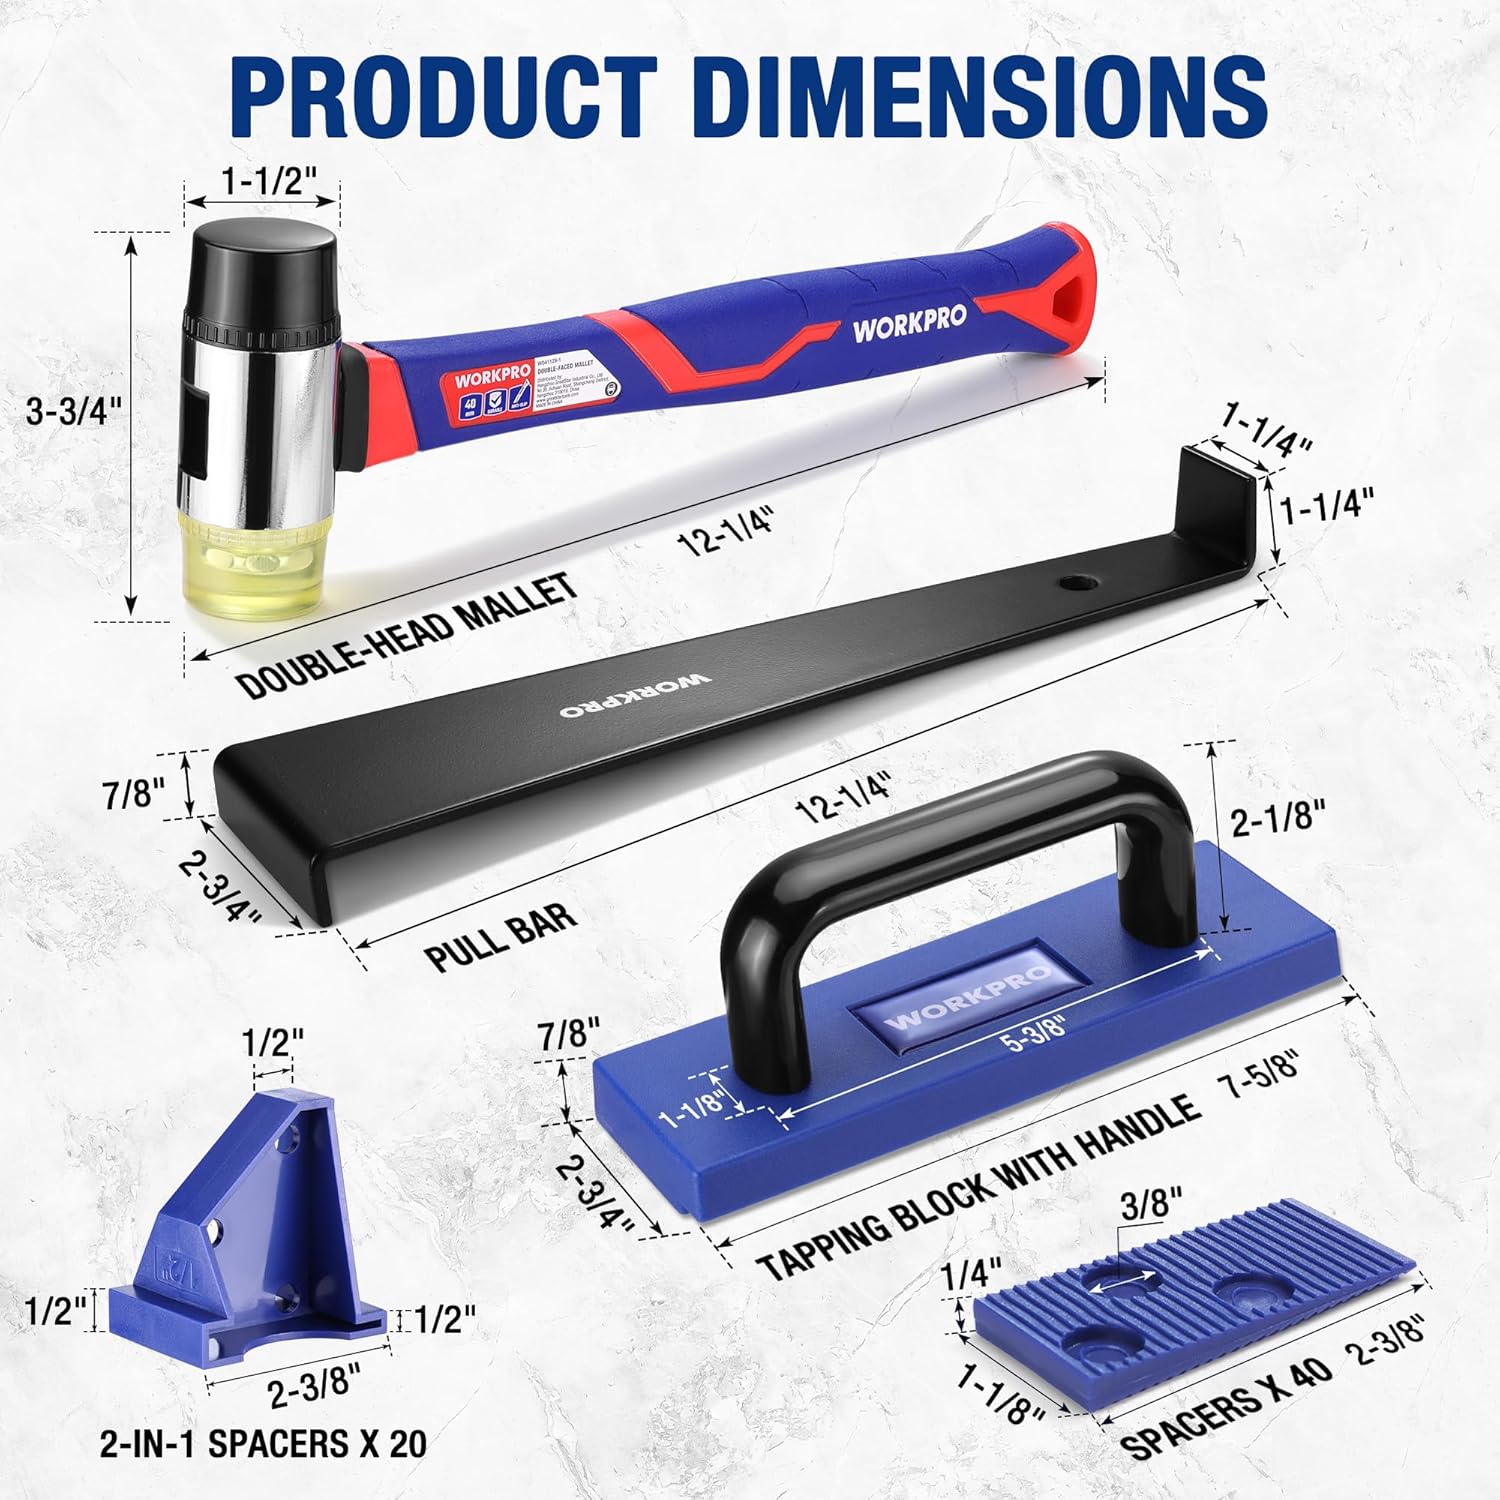
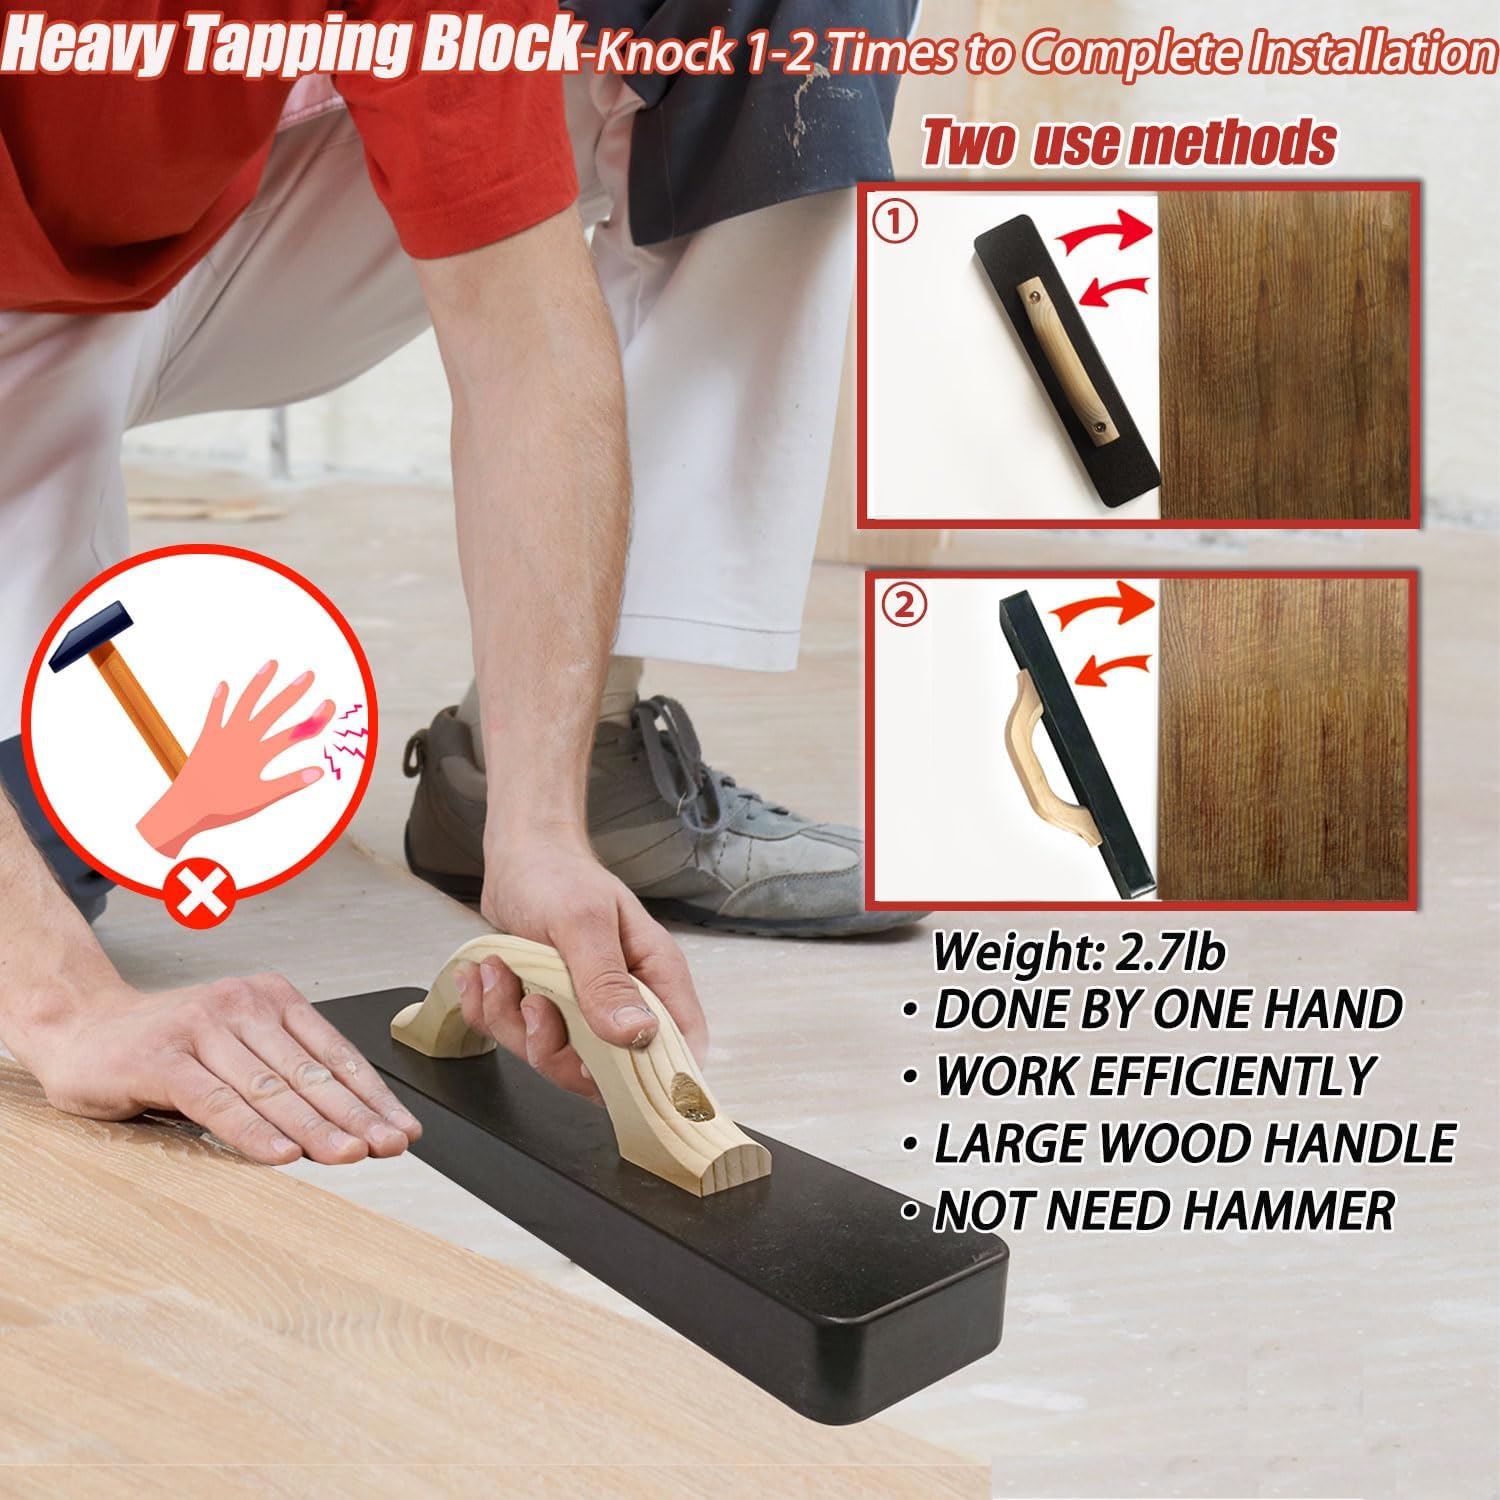
Check price on AmazonTapping Block and Pull Bar
Every floating and tongue-and-groove installation — including engineered click-lock — requires you to seat boards tightly together. A tapping block is a short piece of shaped wood or hard plastic you press against the board’s edge and strike with a hammer to close the joint without damaging the tongue. A pull bar is a hooked tool that lets you do the same thing at the wall where you can’t swing a hammer freely.
These are inexpensive (often $10–$20 combined), and almost every flooring retailer bundles them. The Spruce’s coverage of expansion-gap installation identifies the pull bar as the most commonly forgotten tool that stops first-timers cold on the last row — because you simply cannot close that final board against the wall without it. Don’t skip it.
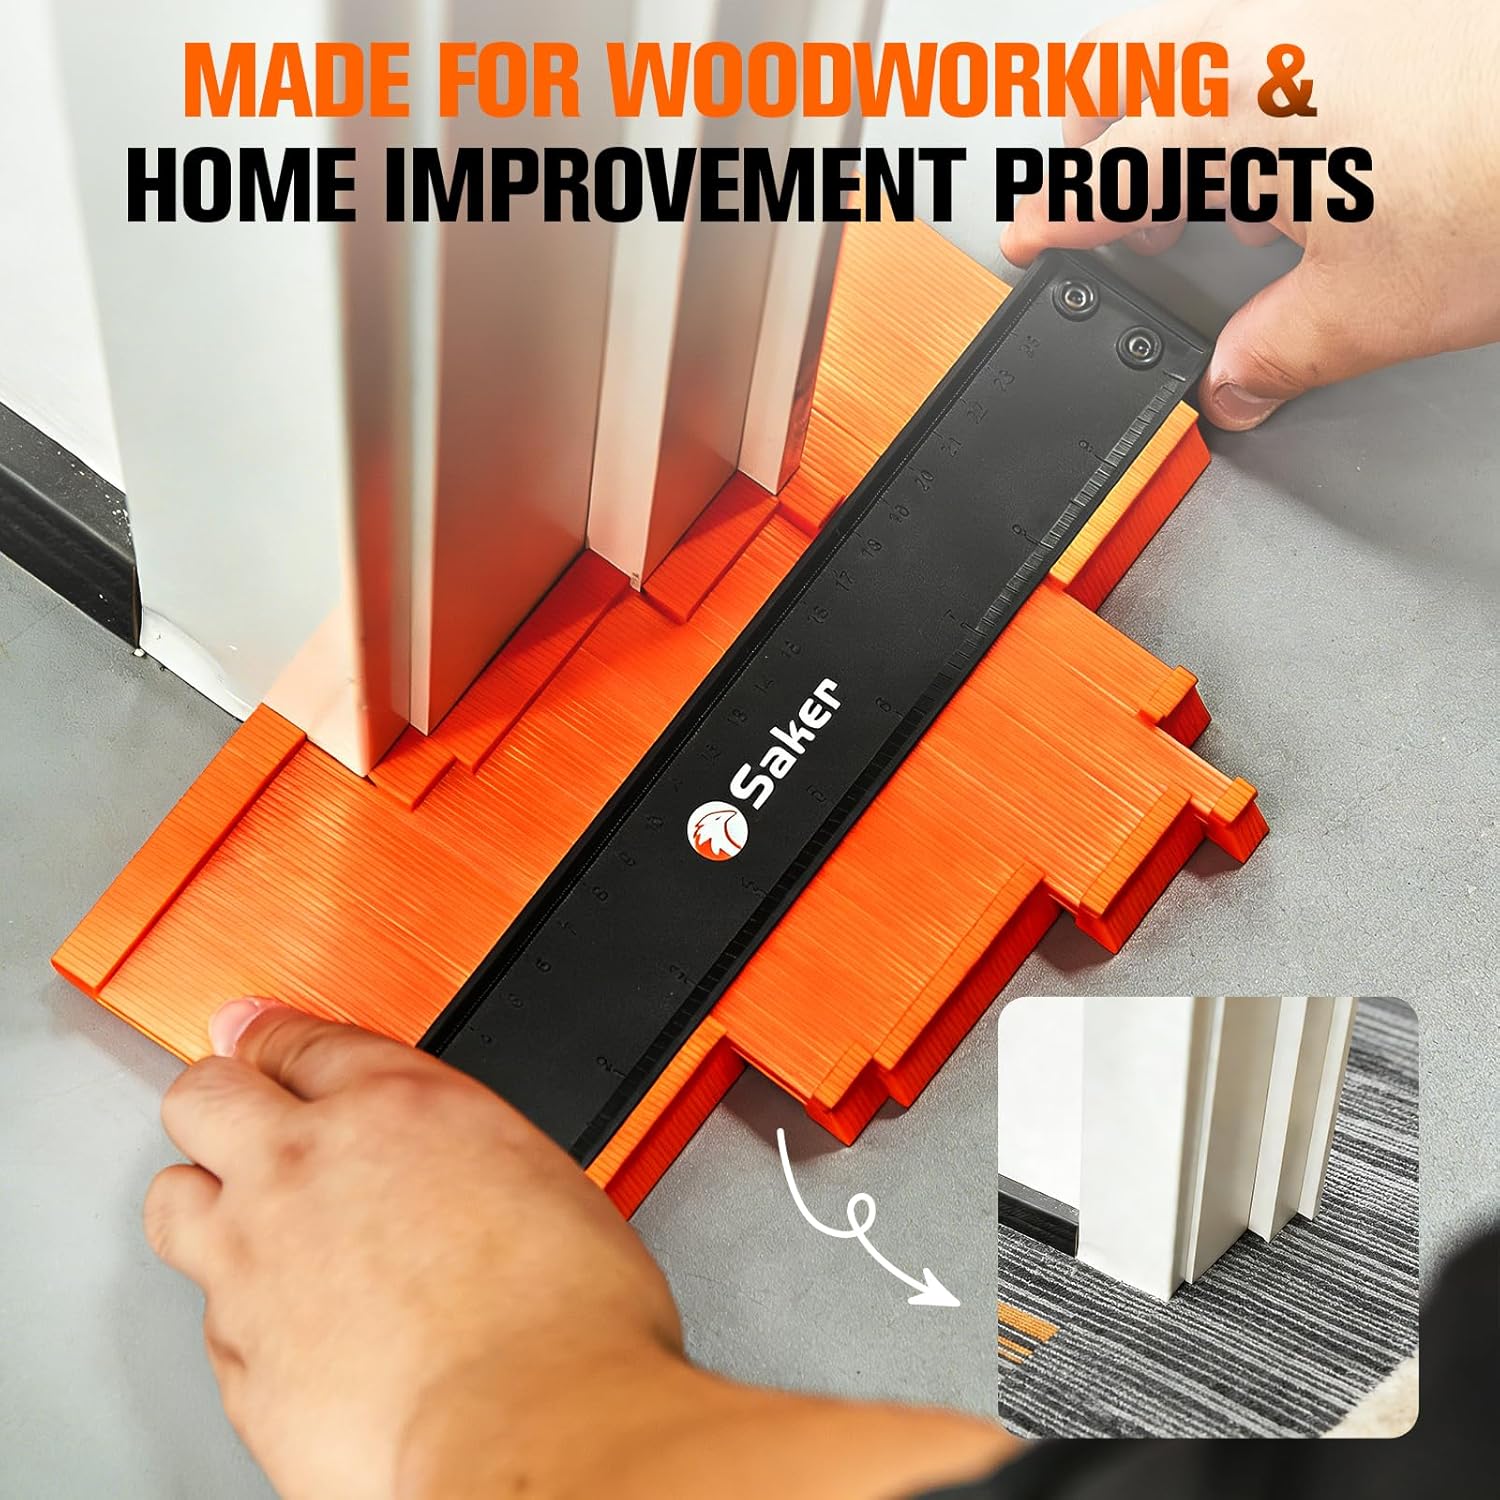
Spacers
Wood expands and contracts with humidity changes. Every hardwood installation — solid or engineered — requires an expansion gap (typically 1/2 inch to 3/4 inch) around the perimeter of the room so the floor has room to move without buckling. Spacers are small plastic wedges that hold that gap consistently while you work.
The National Wood Flooring Association’s Publication B100, Installation Guidelines for Wood Flooring, identifies failure to maintain proper expansion gaps as one of the top causes of hardwood floor failures, including cupping and buckling. Spacers cost almost nothing. Use them on every wall. Don’t improvise with scrap wood — the whole point is dimensional consistency.
A Quality Moisture Meter
If there’s one tool category where DIYers consistently under-invest, it’s moisture measurement. A moisture meter is a handheld device that reads the moisture content (MC) of your subfloor and your wood boards before installation. The NWFA Publication B100 specifies that solid hardwood should be acclimated to within 4 percentage points of the subfloor’s moisture content before installation begins. For engineered hardwood, the tolerance is slightly wider, but the measurement still matters.
Maple is particularly unforgiving here. It’s a denser species than oak, which means it moves less per percentage point of moisture change — but when it does move, it moves with force. Installing over a wet subfloor or skipping acclimation is how you end up with a floor that gaps in winter and buckles in summer.
Fine Homebuilding’s coverage of subfloor preparation recommends pin-type meters — the kind that drive two small probes into the wood surface — for subfloor readings, noting they outperform the pad-style pinless meters commonly included in kit bundles, particularly when reading concrete slabs with a flooring-specific calibration mode.
Tool Comparison by Project Scope
| Tool | Budget Approach | Mid-Tier Approach | Premium Approach |
|---|---|---|---|
| Flooring nailer | Manual mallet nailer, $50–90 Saker — $19.99 | Rented pneumatic, $45–65/day NAACOO — $39.99 | Owned pneumatic, $300–500 QWORK — $52.97 |
| Moisture meter | Basic pin-type, $25–35 | Mid-range pin-type with calibration, $50–70 | Multi-species calibrated digital, $80–120 |
| Tapping block + pull bar | Bundled retail set, $10–20 | Same — no upgrade needed | Same |
| Spacers | Bag of 40+, $5–12 | Same | Same |
| Saw for crosscuts | Circular saw + speed square | Rented 10-inch miter saw, $40–60/day | Owned compound miter saw, $300–600 |
The Middle Ground: Worth It for Most Projects, Optional for Some
A Miter Saw (or Circular Saw with a Flooring Blade)
You need to cut boards to length. A miter saw — a powered saw that pivots to cut precise angles — makes this fast and accurate. For a straight-run install with no angled transitions, a circular saw and a speed square can get the job done. But the moment you’re dealing with diagonal installs, herringbone patterns, or doorway angles, a miter saw earns its place quickly.
This Old House’s hardwood floor installation walkthrough recommends a 10-inch compound miter saw as a versatile minimum for flooring work. For most single-project DIYers, renting makes more sense than buying unless ongoing home improvement work will justify ownership.
Knee Pads
Not glamorous. Non-negotiable if you’re doing more than one room. Two days on a hardwood subfloor without knee protection is how people decide they should have hired this out.
Chalk Line
A chalk line — a reel of string coated in colored chalk dust that you snap against the floor to leave a straight reference line — is how you establish your starting row. Hardwood floors need to begin parallel to the longest wall or the dominant sightline in the room. Get this wrong and every subsequent row compounds the error. A chalk line costs approximately $5 and takes two minutes to use correctly.
What’s Filler: Skip These Without Guilt
Oversized “Flooring Kit” Bundles From Discount Retailers
Several big-box and online retailers sell “complete flooring installation kits” at $60–$120 that bundle a tapping block and small pull bar, then pad the apparent value with a rubber mallet sized for trim work (too light for flooring), a box cutter, a pencil, and a tape measure. You almost certainly own a tape measure. The rubber mallet included is often too small to drive a manual nailer effectively. The actual useful components cost around $20 bought separately. These kits look like deals because each item is tagged individually — but the math doesn’t hold up.
Flooring Adhesive Applicators (Unless You’re Gluing Down)
Glue-down installation — where you spread adhesive on the subfloor and press boards into it — is common for engineered hardwood over concrete slabs and some radiant-heat systems. If that’s your install method, a notched trowel for spreading adhesive is genuinely required. But most DIY solid hardwood installs are nail-down or float-and-click. If someone is selling you an adhesive trowel in a nail-down kit, they’re selling you something you won’t use.
Laser Levels for Standard Residential Installs
A laser level projects a perfectly level horizontal line across a room — useful for hanging cabinets at consistent height. For flooring, which follows the subfloor plane rather than a projected level line, a standard 4-foot spirit level is what you actually need to check for subfloor high spots and dips. Laser levels aren’t wrong, exactly, but they solve a different problem and cost significantly more for no practical gain in a standard floor install.
The Decision Rule: If X, Then Y
Here’s how to map your situation to the right kit:
If you’re installing engineered click-lock over an existing subfloor in one room: You need spacers, a tapping block, a pull bar, and a moisture meter. That’s your whole kit. Rent nothing, skip the nailer entirely, and spend $40–50 total.
If you’re nailing down solid hardwood in 1–2 rooms: Rent a pneumatic nailer and compressor for the weekend. Buy a moisture meter, spacers, and the tapping block/pull bar combo. Total out-of-pocket: $100–150, plus rental.
If you’re a contractor doing multiple installs annually: The ownership math on a pneumatic nailer is clear by the third job. Spec a 2-inch 16-gauge cleat nailer, a pin-type moisture meter in the $60–80 range, and build a permanent kit. Fine Homebuilding’s tool coverage makes the case that durability at the pro tier correlates with tools chosen for a specific job function — not tools that arrived pre-bundled.
If you’re working with solid maple specifically: Add 20 percent more time to your acclimation period beyond the manufacturer minimum. Maple’s density makes it less forgiving of moisture differentials than softer species. The NWFA Publication B100 establishes the baseline, but experienced installers consistently report that maple rewards extra patience on acclimation more than almost any other domestic hardwood.
The right kit isn’t the biggest one or the most complete-looking one. It’s the one where every item has a specific job to do on your specific install — and nothing else is along for the ride.